


Baby Boy Sewing Projects
I love sewing for my girl. Dresses, skirts, ruffles, bows, I love it all (in any color except pink). But I did get awfully jealous of people that had little boys to sew for as well, especially when Dana and Rae put on the Celebrate the Boy series. When I found I had a little boy to sew for in August I was THRILLED and couldn't wait to get started on some little boy clothes and diapers. I still have my one size pocket diapers that I used with Bug, so I was just updating my diaper stash a little bit.
 1 newborn fitted from the free Darling Diapers Unlimited pattern, 5 newborn all in 2's from the LaDiDa pattern, 4 one size pocket diapers from the LaDiDa pattern, and 1 one size pocket diaper from my own pattern.
These are all wool longies meant to be used as diaper covers. They are all made from the free Katrina longies pattern. I used wool sweaters I thrifted to make them. These first 3 pairs are newborn size, they are so itty bitty! Nate has pretty much outgrown them now, but they fit for about 2 weeks.

Size smalls

Size mediums
 12 fitted diapers made from the precut kits sold here at wazoodle.com. I actually love the fit of these, although the absorbency could be a little better. I'm thinking about ordering a kit for a dozen mediums. It was really nice not to have to cut out all the pieces, they went together very quickly.
 Infant Lap Tees, as seen on my tutorial. The tees started getting a little snug at a little over 10 pounds for him, perhaps his broad shoulders were part of the problem :)
 Pants!! I used a pattern from an Ottobre magazine for these pants. I love how professional they look, they've got so many cute little details. They seem to be a bit big for the 0-3 month size range that they were meant for though.
 Vests!! I love these adorable little vests, the second one is made out of organic bamboo fleece and is sooo soft and yummy. Again, from an Ottobre magazine pattern.

Hopefully the outfits will fit him soon, then I can share pictures of the clothes on a baby, much more gratifying and infinitely more adorable!


 When we took this picture, our dreams were actually relatively simple now that I think about it. We dreamed of being free of our oppressing parents, being able to pay our own bills and be self sufficient, and thought endlessly about the future and how great it would be.
 Two years later we were still dreaming, now about wedding plans and me about a career in teaching that I was going to be ready to start in two more short years.
 Then we were dreaming about a house and a little unexpected but much anticipated baby girl that would change our lives forever.
 As each of our dreams came true another dream crept in to replace it, always pushing us forward in our life journey. I never imagined that I would ever dream of becoming a housewife. The idea of staying home all day to cook and do dishes and fold laundry and vacuum was repulsive to me. Well, repulsive is a strong word, it's really only the cooking that I detest, but that is enough! I could not think of any reason that I would trade a career that I loved to stay at home.
 Then I met my little Bug, took her home, and realized that I could spend the whole day just staring at her and be completely fulfilled. I then understood why stay at home moms gave up their careers, a life outside of the home, and slaved away in the kitchen just to be with their kids. I had a taste of being a mom, and it turned out to be all that I wanted, and all that I couldn't have.
 I had to keep teaching and bringing home my half of our income so that I could continue to do my part to keep the dream of owning our own home and paying our own bills alive. I had to try and learn how to balance the demands of being a teacher with the demands of motherhood. The days of early mornings and late afternoons, taking my extra work home with me, and being really great at my job were over. As were the golden days of summer when I could watch my girl learn and grow by the hour and didn't miss one special moment, newfound skill, or little smile. It took me a while to put a finger on why I wasn't happy, why I started to resent my career path, and what it would take to make things work.
 I had to embrace the words "Good Enough." A perfectionist to the core, I have never been happy with anything that was not my very best. I am not satisfied unless I know that I have put my best effort into the task I am working on. Balancing teaching and motherhood meant that I had to be satisfied with being good enough to get by. I started making a new dream, a dream that revolved around staying home with my babies when we had our second child.
 Well, since our dream of a baby boy has come true, so has my dream of becoming a stay at home mom. I decided to take a leave of absence from teaching and see how it feels to spend a year at home. I cannot begin to describe how amazing it feels to be able to focus on being a mother, I feel like I have been able to find myself again after losing who I was in the balancing act I was trying to pull off.
 Of course, our financial needs have remained the same, and I need to bring in some sort of an income, which means that I will soon become a work at home mom as I start my own home daycare. I still love working with children and teaching, and a home daycare will let me continue to teach while staying home with my babies.
 For now, I get to spend my days being fulfilled by these sweet little faces :) Isn't freedom grand?
 It's hard to believe how much life can change in the matter of a few days. I have a whole new perspective as a mother of two beautiful children. I think finding real balance will take some time, but meanwhile, we at least have some semblance of order.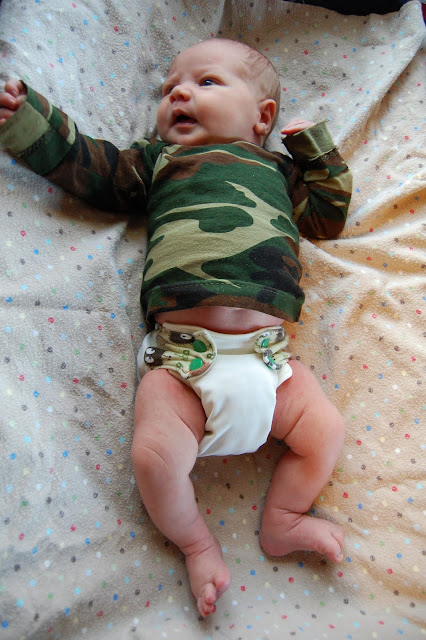
 I am proud to say that I got both kids in the car and left the house just week after he was born! Something I was a little frightened of to be completely honest. We attended our local breastfeeding support group, and I found out that this kid is already back to birth weight and then some. So the middle of the night cluster feedings are paying off! We also ventured into Target to make a run for more breast pads and sour cream. Maybe adjusting to life with two kids will be easier than I thought it would be. ((knock on wood))


 Attach the neckline for both the front and back pieces.
 Don't forget to change your settings back to normal after you finish both sleeves.
 Fold over the sleeve so that it matches the edge of the armscye on the back piece and pin it. Then math the other edge of the sleeve up with the armscye on the front piece and pin it. The shoulder pieces will overlap. Sew down that seam and trim it down. Repeat with the other sleeve.


