Tutorial: Quiet Book Cover
Here it is at last! Another camera phone tutorial, sadly. It seems that the only hours I have available for sewing and tutorial making occur between the hours of 6:00 PM - 7:00 AM, at which time the sun is down and my flash-less DSLR is pretty much useless. At any rate, now you can make a cover for all your fabulous quiet book pages!
You will need to cut:
*Three 13" x 24" rectangles (inner and outer from quilting cotton and one from batting, warm and natural is my favorite! )
*One strip measuring 3" x 13"
*One strip measuring 2.5" x 3"
*Velcro- 1" strip of 1" wide velcro (hook side and loop side)
Fold the 2.5" strip in half, then pin and sew down the long side. Turn tube right side out. Pin down scant 1/4" hem on the long sides of the 3" x 13" strip and sew.
Turn down the top edge of the small tube twice to conceal the raw edge and pin.
Lay out the batting, then the inner side of the book cover on top. Then find the center of the rectangle and place the 13" strip down the center. On the right side, find the center and place the tab in the center velcro side down. The raw edge of the tab should be placed on the raw edge of the cover.

Lay the outer fabric face down on the inner so the right sides of the fabric are together.
Pin all the layers together around the edge of the fabric. Make sure to pin the center strip and velcro tab securely. Note the lower right section where I placed two vertical pins with about 4 inches in between. You will not sew that part of the cover closed. We leave it open so that we can turn the book cover right side out.
Sew around the edge of the cover, then even up your seam allowance and clip the corners.
Turn the cover right side out through the hole that we left open on the lower right edge.
Poke out the corners and straighten it up, you will have something that resembles a book cover!
Turn the edges of the hole inwards and pin closed. Then topstitch around the edge of the entire book, which will close up that hole nicely.
The next step is to add the loop side of the velcro to the front of the cover. Fold the book in half and use the velcro tab to mark where the placement should be, then pin and sew it down.
Now we will need to divide the center strip into sections. We will use binder rings to hold the pages in the book, but each of the binder rings needs and individual casing in this strip.
First, use one of your book pages to mark out the placement for the binder rings.
You want the casings to be at least 1/2" wide. Then you will need to sew lines where the pins are placed in order to create the casing.
I actually sew 4 boxes to secure the parts of the strip that do not need to be open to give the binding strip more reinforcement.
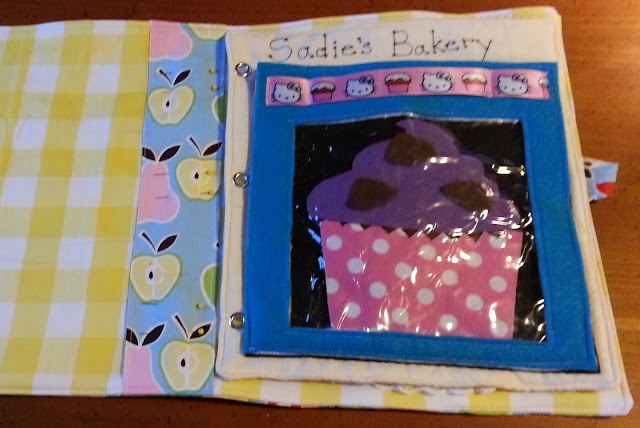
You're nearly there. You will need 3 1.5" binder rings, or you could always slide ribbon or cording through the casing and page grommets as well.
Slide in your 1.5" binder rings.
And add your pages!!! A beautiful cover ready to be abused by young children enjoying their new quiet book. Sadie is going to LOVE her Christmas present!


