Showing posts with label repurpose. Show all posts

Tuesday, July 17, 2012

Tutorial: Tin Can Dollhouse Chair


So, this tutorial has been much awaited by google searchers everywhere.  My first post showed my first attempt to recreate the furniture, and it's pretty popular!  I thought it wouldn't be too hard to do a tutorial, but it proved to be difficult to illustrate using photos. (It's not easy to photograph these things, by the way.)  So this tutorial uses a combination of diagrams and photos, but you may need to use some trial and error and imagination along the way.  I hope this can help you quill some tin can doll furniture of your own.

Start with a can.  I used a soda can, which is aluminum and fairly malleable.  I think you can use other types of cans as well, but I would imagine that you would need some nice strong tools if your material is smaller.
I used some heavy duty scissors to cut off the top of the can.  I poked a hole, stuck the scissors in and went for it.
Trim off the curved portion of the can, make it as smooth as you can.  The next step is to mark and cut 1/4" strips around the can.  Your goal is to cut 54 strips total. 

This is where things got a little bit tricky here.  This diagram will give you a better picture of how the strips will be used to make the chair.  They are color coded.

There are only 2 techniques you need to know to make furniture, how to curl the strips and how to clamp the strips together.   The tool that I use is a pair of round nose pliers that are used for jewelry making, easily found at your local craft store.

To curl a strip: Grab the end of the strip with the pliers, twist the pliers away from you to begin the curl.  You can continue to curl the strip with pliers, but I prefer to finish curling up the strip with my fingers.

These short strips are clamps.  They are used to connect strips together when you are forming the chair.

To attach a clamp:  Fold the clamp in half to make a crease, wrap the clamp around the strips, and squeeze the clamp shut with the pliers.
 
Let's make a chair!  We need to start with the chair front, because that is where we get the clamps to make the rest of the chair. 

Step 1:  Cut off about half of the center strips to be used for clamps.
Step 2:  Curl the strips up to the top of the can, twist the curled strips to the side gently.


To make the legs, twist the strips gently to the center.  Gather the strips together and use a clamp to hold them together.  Slide the clamp so that it is about 1 1/2 " from the top of the can.
Use the round nose pliers to curl the ends of the strips out toward the edge.
Then use your fingers to roll up the curl all the way to the clamp.  Repeat for the other 3 legs.
Voila!  You have a chair that can stand on it's own 4 legs.  That was the easy part.

Time to do the back of the chair.  The crazy awesome part that is totally worth it.
Turn the 8 inner strips to the center, and clamp them together.
Curl down the two outer strips down to the clamp.


The next two outer strips will be used later, put them to the side and curl down the next two strip down.

The two strips that were put to the side, are going to be pulled around and clamped to the last two strips in the center.  It will be helpful to curl up the ends before you clamp it up, you can adjust it as needed.  Curl down the two center strips until they touch the touch the larger loops.


Attach the next two strips on the outer edge to the large loop with clamps.

Now curl the edges of the last two strips in,  and clamp the curls together.  It's tricky, keep trying.


Congratulations!  The hard part is over.  I promise.
 We reserved 7 strips for the arm rests.  4 strips get bent up to use for the arm rest, and 3 get bent down and curled, just like the chair front.  Start at the right side of the diagram and work to the left side.  Clamp the two strips together, leave some slack in the rightermost strip to give the piece a nice curve.  Curl down the edge of the rightermost strip.  Clamp the other 3 strips together, curl down the 2 strips on the outer edges.  Lastly, attach the center strip to the chair back with a clamp,  and curl up the strip.


That is it, you're finished with the chair.  I'm sorry if the tutorial is a little rough, but I hope it gives you a better idea of how to make vintage tin can doll furniture.

I will be working on another tutorial for the ottoman, and now that the basics are here, you can get creative and work on your own designs.  If you would like some inspiration, check out my board on pinterest.
Friday, June 29, 2012

Tie Dye Fun


  We had some fun with Sharpies yesterday :)  Natalie said she wanted to do a craft, and I decided it was high time we tried out dying shirts with permanent markers.

 We gathered our supplies first. I had to search 3 locations to round up all these sharpies, and I have a nagging thought that I must have more somewhere that got stashed away when I packed up my classroom and brought it home.  I think teachers might be the top offenders on the most likely to have permanent marker collections list.  At any rate, it only took me one trip to find the rubbing alcohol.  We rounded up some old white shirts and rejuvenated them out on the deck.
I loved it, in case you couldn't tell by my crazy melee of successful and failed techniques on my shirt.  In the end, it's colorful, and even the wonderful husband came home and said that my shirt was pretty :)  Natalie was very impatient to get to the rubbing alcohol bit, so she would make a few dots, or scribble a bit, then use the dropper to make the colors run.  She abandoned me halfway through for her swingset, then came back for some more fun.  Overall, this was fun and very easy and very very gratifying. I'll definitely be trying it again!

Monday, May 28, 2012

Another quilt to share

This is t-shirt quilt #3 this graduation season.  Another purple quilt, I think this is the seventh purple t-shirt quilt I've done.  This mom is incredible.  This is the 4th (and last) quilt that I've done for her, and she has saved EVERYTHING that her kids could possibly want to see on their t-shirt quilt.  Things from elementary school, middle school, high school, summer camps, interests...  I can only hope to be as thoughtful as my kids grow.  Although, if my hoarding tendencies are as bad as I know they can get, we'll have enough memorabilia for 10 t-shirt quilts, lol.

I can't believe that this is the first quilt I've done with signatures on a t-shirt.  While I'm sure the memories are fantastic, it was a bit of a pain to try to get maximum signature exposure without taking up 1/3 of the quilt.

Wednesday, May 23, 2012

Dainty Dresses for Africa

 I love the Crafterhours blog, they come up with so many cute ideas and fabulous tutorials.  When they posted about Dresses for Africa I decided to send in what I could to give these girls new dresses.

 I used what I had sitting around my sewing table- red gingham, and an entire bag full of t-shirt quilt leftovers.
 
 I was worried about how the gingham would hold up since it is a looser weave, so EVERYTHING is super duper reinforced.
 The other dresses were made from t-shirts like the tee-to-tank tutorial on Crafterhours.  Once I got started with the t-shirt dresses I couldn't stop :)  I ended up sending 17 (!!) dresses off today!


The only thing about making t-shirt quilts that bothers me is how much t-shirt fabric is left over.  It is often too little to be useful yardage and too much to just throw away.  I have a bin full of leftovers stored in the barn, and a full bag from the last 3 quilts.  I was able to make 15 dresses of varied sizes just from the sizable leftovers in the bag.  I did have to piece together some of the smaller widths to get the length I needed.
 I also stumbled upon an idea that kept me from needing to make casings at the top.  The hems are already there!  These are tubes from the bottom portion of two shirts joined together with the armholes cut out of the white tube.  This opened up the hem and allowed the straps to be fed through the casing easily.  I used a zig zag stitch to secure the ends of the hem so that it wouldn't unravel.

 I hope the recipients enjoy these just as much as I enjoyed making them!

Thursday, May 3, 2012

Sister, Sister!

 Just finished two more t-shirt quilts, this time for two sisters.  (It's  graduation season, so I have two more on my table as well!)

Sister #1 wanted a quilt using just her college soccer shirts.  She is into neutral color palettes and a simple sort of elegance.


 I love love love this fabric combination, especially the floral print sashing around the shirts.  I can't wait to make something from the leftovers!


Sister #2 wanted a quilt that featured all of her favorite high school memories. Her style is very bright and fun, but I wanted to keep it sophisticated enough to grow up with her.  She has to love this quilt forever.

 The fabric in this quilt was not easy to photograph, it didn't come out quite as pretty as it is in real life.  The green/blue/yellow paisley is bright and fun, but I don't think it is stuck in the junior stage.  The sashing is hard to see as well, green infinity loops on a white background complement the paisley very well.

 Two very different sisters with two very beautiful quilts.  

Thursday, April 19, 2012

DIY Sticker Mat

What fun is it to have birthday stickers if you can only stick them once?  Bug needed a sticker worthy surface that would let her peel and restick her fun new stickers.

 So I peeked into my closet to do some stashbusting and found a cricut cutting mat that had served its purpose.  It was no longer sticky enough to work properly (which could be remedied with glue materials) and it had gunky corkboard chunks stuck to it (I tried but they are S-T-U-C-K stuck). It had seemed like a waste to throw it away, so I kept it, knowing a day like this would come.  I pulled out some scrapbook paper and had just enough spray adhesive left in the can to glue the scrapbook paper to the mat.
 Then I covered both sides in contact paper and smoothed out the bubbles.
Trim around the edges and voila! a sticker mat for hours of sticking and resticking pleasure.

It seriously took less than 10 minutes from the time that I peeked into my closet to done.  Can't ask for an easier early morning project. (Don't you just love the bedhead? :)

Thursday, April 12, 2012

Cookie Concentration Case Tutorial


We love our cookie concentration game.  However, the gallon size ziploc and construction paper game mat weren't faring too well with all the use they were getting.  Our upgrade is quite fabulous in my humble opinion :)

Materials: Fabric- 2 cuts 11" x 21"
                            - 1 cut 32" x 1.5" or 32" bias tape
                            - 1 cut 11" x 2.5"
                  Vinyl - 1 cut 11" x 8.5"
                   Zipper - 11"
                  Velcro - 1.5" of both sides
                   Embroidery Floss

 Easy way to get vinyl and a zipper- upcycle it from a bedsheet package you have in your stash :)
 1- Take your 11" x 2.5" piece of fabric, fold it in half and sew.  Turn it inside out  (a loop turner makes this easy!) and press with the seam in the center.
 2- While the iron is hot- make your bias tape.  There is a great tutorial on making bias tape here.  Cut into two 11" pieces and two 5" pieces. (Mine is not cut on the bias, while true bias tape that is cut on the bias is better, sometimes it is easier to cut on the grain for some purposes.)  To iron, I folded the fabric in half and ironed it, unfolded it, folded the outside edges to the center crease, ironed them down, then folded the tape in half and ironed again.

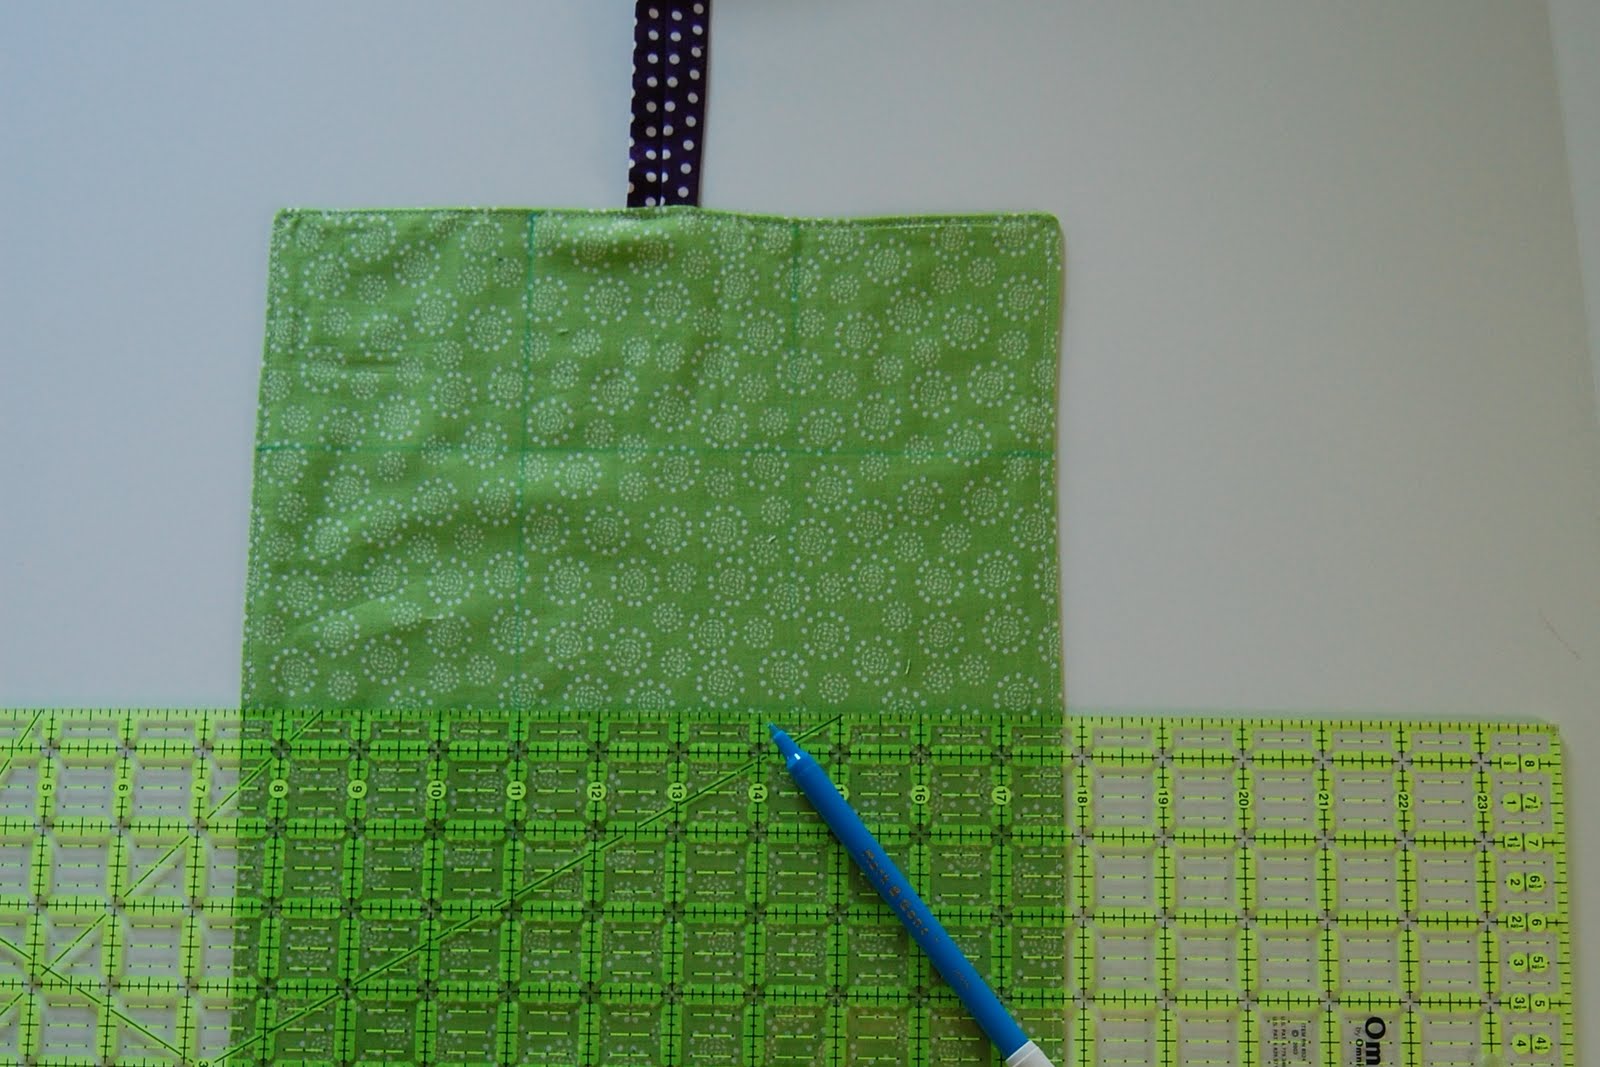
 3- Start the game grid.  To make your sandwich, take your two cuts, lay the inner face up, the 11" tube in the center with the seam side down, and the outer face down.  Sew around 3 sides, leaving the bottom open.  Turn and topstitch around the 3 sides, iron again if needed.
 4- Mark out the 3 x 6 grid.  My lines are 3 1/4" apart.
5- Sew down the lines with the longest stitch on your machine. We'll embroider to define them later.
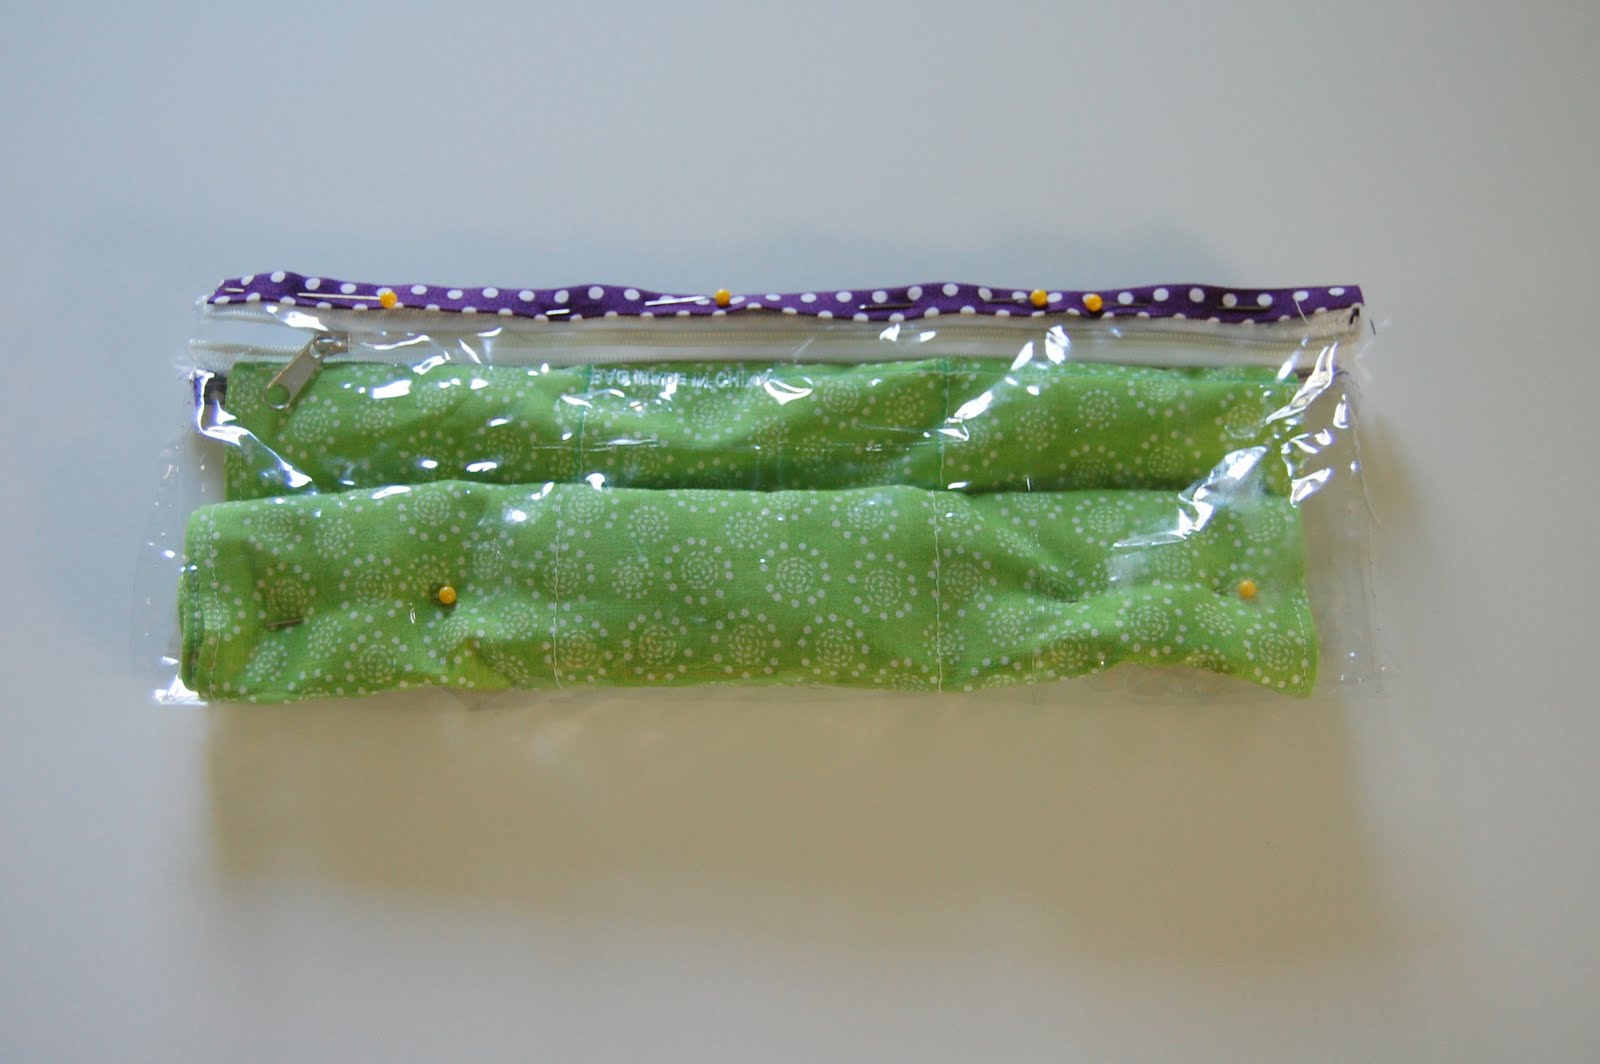
 6- Start on the case!  Sandwich the vinyl face up, grid face up, zipper face down.  Sew a seam down the sandwich.
 7- Cover the seam with bias tape, pin, and sew.
 8-  Roll up the grid and pin.
 9- Fold up the vinyl to the other zipper half, pin and sew.
 10- Cover with bias tape, pin and sew.
 11- Open up the zipper, and turn right side out.
 12- Flatten out the pouch, fold and pin bias tape to the edge, and sew.
 13- Attach bias tape on the other side and you have a case :)
 14- On the tube, fold over the edge two times and pin.
 15- Pin and sew sticky side of velcro to the top over the center seam.  Pin the soft side of velcro to the base of the tube on the opposite side.
 16- Time to embroider the grid! I used a whipped running stitch with embroidery floss over top of the machine stitched lines.

 In short, run the needle through the top of the stitch, pull through, and lather, rinse, repeat.


And TA DA! You're ready to play cookie concentration in style!

 Houndstooth. Grey. Yellow. YES PLEASE!! (I'm keeping this one for me and Bug.)


 P.S.  I think the grid could be equally cute (and less time intensive) using ric rac or other types of embellishment, I just didn't have any on hand in my stash.  If you do want to use another embellishment like ric rac, I would sew it on the grid before making the sandwich for the top, then sew the sandwich as directed to conceal any raw edges.