Showing posts with label stashbusters. Show all posts

Tuesday, May 22, 2012

Dainty Dresses: Infinity Dress

 Last year I was on an infinity dress kick, I made a few for myself and one for Natalie.


 I love how light and comfy they are. 
 There are so many cute options with all the strap configurations.
I made another one this year. I was stashbusting, so I had a few "make it work" moments, but I love it when those happen :)  Things turn out so much better when you stretch yourself.  The contrasting straps were a result of the fact that I didn't have much of the purple knit since it was a remnant.  A knit jersey, preferably with a bit of spandex, is the best fabric for this type of dress.
An infinity dress is basically a glorified circle skirt with long straps attached.  First you need to take measurements.  I measured around Natalie's chest (20 inches), and from her chest down to just past her knee (19 inches).  I won't go over how to cut a circle skirt.  Dana did an expert job at explaining how to make a pattern for a circle skirt here.  Just substitute the chest measurement for the waist measurement.
Cut our your circle skirt, two straps that are 1.5 times as long as the height of your subject. These straps are 5 inches wide.  A general rule for strap width is the chest measurement divided by 4.
Overlap the two straps by about 1-2 inches, then place on the edge of the circle skirt.
Pin the straps to hold them in place.
Sew or serge down the straps to secure them for the next step.
This shows how the straps should be overlapped.
The next step is to add a band around the waist.  I made the band from the same jersey as the dress in the red dress.  This time I happened to have grey elastic that matched the straps.  I cut the elastic to size (chest measurement), and joined the ends.
Then I attached the band to the skirt at the two side points as well as center back, and center front.  I placed the seam of the elastic on the side because sometimes the back of the dress can be the front when tying the dress up.  Overlap the elastic and the edge of the skirt by 1/4".
Stretch and sew the elastic down and you are finished.
Have fun trying out the infinite number of looks you can get.

Thursday, April 19, 2012

DIY Sticker Mat

What fun is it to have birthday stickers if you can only stick them once?  Bug needed a sticker worthy surface that would let her peel and restick her fun new stickers.

 So I peeked into my closet to do some stashbusting and found a cricut cutting mat that had served its purpose.  It was no longer sticky enough to work properly (which could be remedied with glue materials) and it had gunky corkboard chunks stuck to it (I tried but they are S-T-U-C-K stuck). It had seemed like a waste to throw it away, so I kept it, knowing a day like this would come.  I pulled out some scrapbook paper and had just enough spray adhesive left in the can to glue the scrapbook paper to the mat.
 Then I covered both sides in contact paper and smoothed out the bubbles.
Trim around the edges and voila! a sticker mat for hours of sticking and resticking pleasure.

It seriously took less than 10 minutes from the time that I peeked into my closet to done.  Can't ask for an easier early morning project. (Don't you just love the bedhead? :)

Thursday, March 15, 2012

Reusable Grocery Sack Tutorial

 This project has been sitting in various places around my house for nearly 3 years.  I just never made time for it after my initial attempts.  So I am quite proud that I actually finished and got these shirts OUT of my stash :)

WARNING:  This project is purely utilitarian.  These shirts are not cute, in fact, they may be considered downright ugly.  You may also need sunglasses if you want to make it all the way through the tutorial sans migraine.

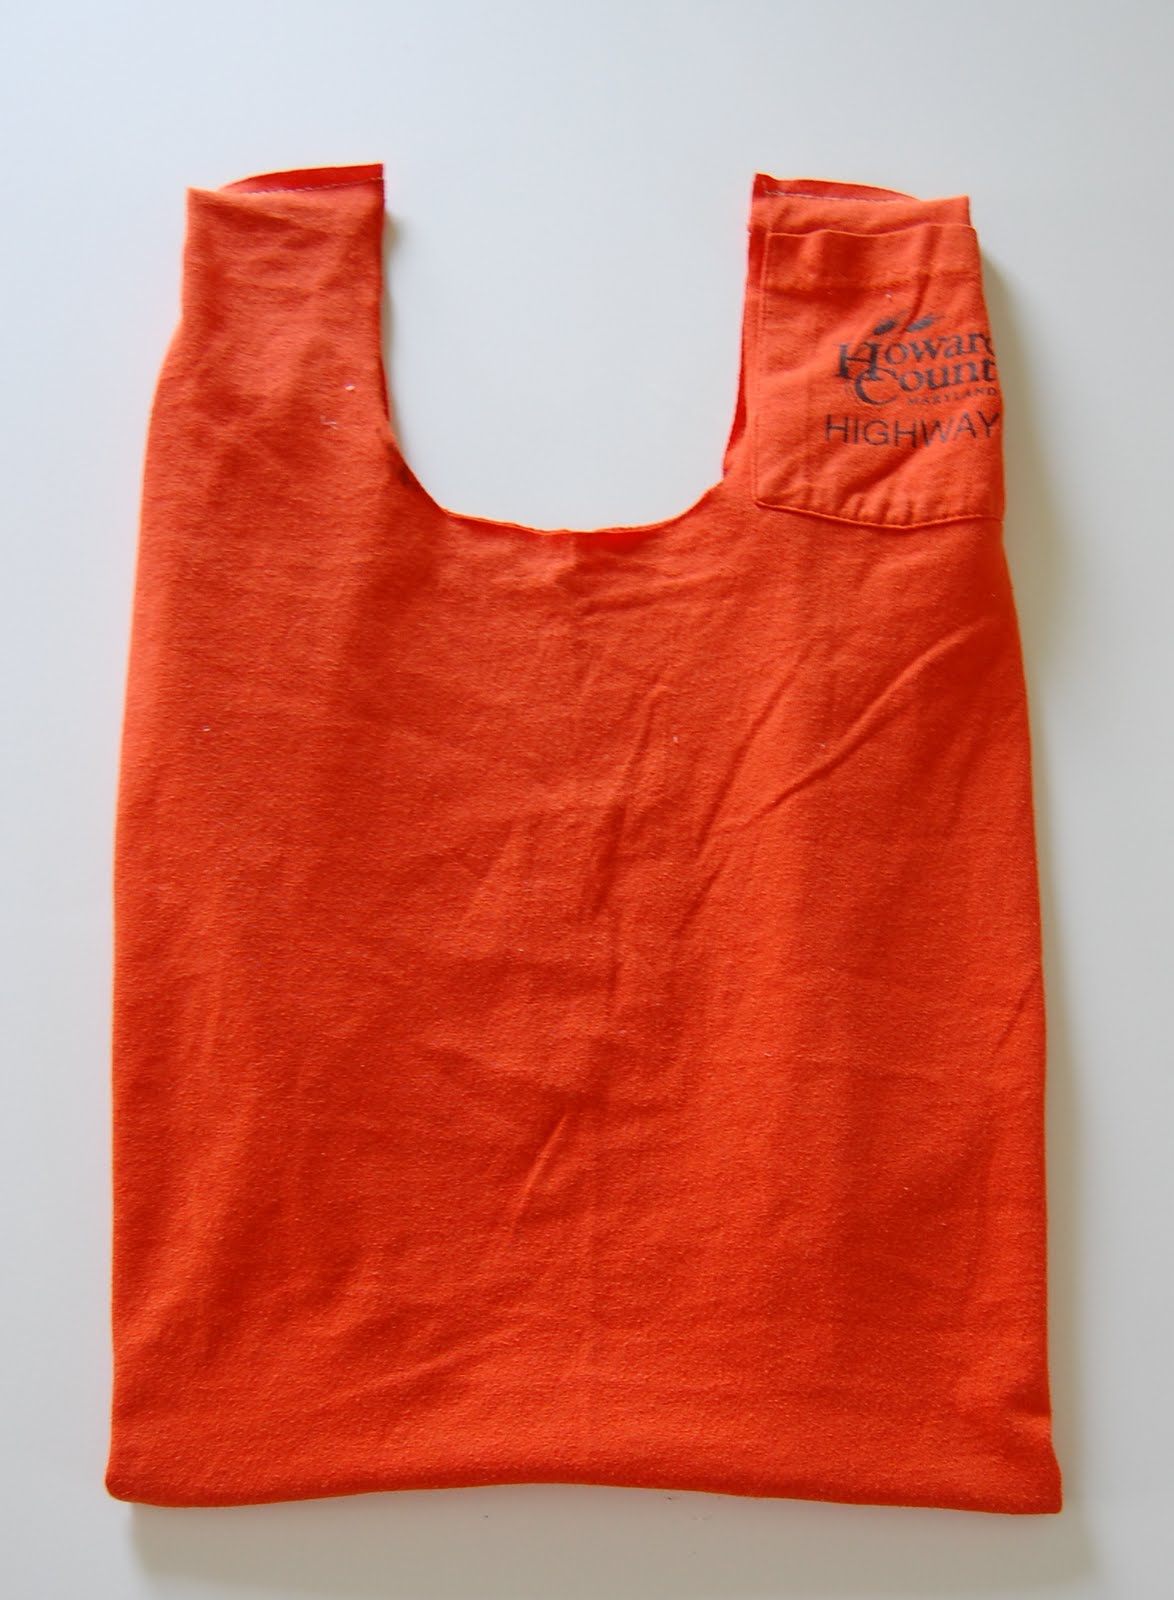
The hubby works in the highways department for the local county, he is required to wear brightly colored, headache inducing shirts so that he is clearly visible when he works outside.  When they switched from bright orange to fluorescent yellow, we were left with all these orange shirts that had the county emblem slapped on the pocket.  I decided save them to make reusable grocery bags.

I made 3 attempts to create a workable bag design way back when.  The first two were hardly big enough to hold one box of cereal, and it is a bad idea to serge around the top of the bag/handles (no stretch).

At least the 3rd attempt couldn't be accused of being too small, ha ha.  That is when I gave up.

 I fixed attempt #3 with some elastic, and I kind of like it now.  But I still went back to the drawing board on the design that I wanted.

This time I drew my inspiration from "real" grocery bags.  The plastic kind you get from the store that have already had their designs tested numerous times.  This time I met success :)

 So without further ado, the Grocery Sack Tutorial.


Take your shirt, ugly or cute, and lay it out flat.
 Measure and cut a 20" x 20" square.
 Make marks 4" in from the sides on the top and bottom.
 Fold over the edge on both sides, like it is on the left in the picture.
 Use a grocery bag to trace out the handles and cut them out.

 Unfold the edges.  If you are going to be making several bags, use this one as a pattern to cut out the rest.

Sew across the handles at the top and sew or serge down the sides.
 Turn the bag inside out,

 Fold in the edges again, and sew or serge across the bottom.
 Clip threads or tuck in the tails. 
 Flip it right side out and you're done!  I chose to sew a quick seam across the handles to keep them straight.


Saturday, February 18, 2012

Project Fail: Rapunzel Wig

Every had an idea that sounded soooo cool in theory just to have it not only fall short of your expectations but fail miserably?  I was considering not even sharing this attempt, but it's real and I'm a tiny bit heartbroken about the whole thing :)

Bug LOVES the movie Tangled.  Like we watch it or have it on in the background while we play EVERY day.  So much so that I have a bit of a voice crush on Flynn Rider.  There were so many cool ideas for Rapunzel wigs in the blogosphere.  I was inspired by this tutorial at Sew Like My Mom and this tutorial at This Mama Makes Stuff .  The project seems pretty foolproof right?  

Well then the stashbusting part came into play.  I don't have golden yarn for long Rapunzel tresses.  My oh-so-cool-and-creative idea was to use t-shirts from my upcycle pile and a pair of outgrown tights to make my own version of her wig.  I even got so excited about my idea that I took the time to take pictures of my process.

I cut my shirts into 1/4" strips using my rotary cutter and ruler.  then STRETCHED them as far as they could go.  The first shirt is one of the thin rib knit t-shirts that doesn't have much recovery, so it stretched beautifully and gave me nice long strands.  The tank top had a lot more elasticity, so it recovered a lot more, making for shorter strands.

 Do you see the same problem I saw?  These two yellow shirts did not yield nearly enough hair for a proper Rapunzel wig.
 So I branched out into my fabric stash and found this yellow tube knit that I got for free eons ago.  It was thrown in a package of fabric I bought so that the lady could get it out of her her stash.  I cut the entire yard of fabric into yellow strips and stretched them out.  What I did not foresee was the VERY unpleasant side effect that these stretched out strands would SHED teeny tiny puffy yellow balls of fuzz everywhere.
 Aside from that, I was pretty sure that I had enough strands of hair to make a proper wig now.
So I went to work at the hat made from tights in the 2nd tutorial I shared, and sewed on the strands in the method of the first tutorial I shared, and eventually all of the strands were attached to the hat and sewed down so that you couldn't see the tights hat underneath as much.  Decided that Tangled was the perfect name for the film and for the mess that was the wig after Bug ran around wearing it for a minute.  I untangled the mess and braided the wig, much to the disappointment of Bug.  We also had to add an elastic band around the edge of the hat that would grip Bug's head a bit better so that I wasn't putting it back on her head every 72 seconds.


I was going to add some felt flowers, but I felt completely done with spending my valuable crafting time on this failed project.  Bug loves wearing her "weally looooong Wapunzel hairs", but leaves a trail of teeny tiny puffy yellow balls of fuzz behind her.  Maybe we should be playing Hansel and Gretel instead?

Friday, February 17, 2012

Discovery Bottles

 My first stashbusting project centered on using up baby food jars I had saved from when Bug had been eating baby food.  I have quite a few more jars  as well- we"ll have to see what they become.

Bug and I made a few discovery bottles/jars using materials we had in our stash.  The only thing I had to purchase was corn syrup, which gave us another fun bottle to fill as well!
Back Row: Red glitter and beads in a 50/50 mix of water and corn syrup
                  ABC I-Spy-Multicolor glitter, star confetti, and alphabet beads in a 50/50 mix of water and corn syrup
                 Color/Shape I-Spy- Various items focusing on colors and shapes in rice (I used pattern blocks, balloon confetti pieces, and colorful mini clothespins) 

Middle Row: Star confetti in water and blue food coloring (we think it looks like a starry night sky :)
                      Dish soap in water with red food coloring, only fill it halfway with water- leave the rest of the room for the bubbles!
                      Pom poms and little jingle bells

Front Row:  Just plain old rice in the first and buttons in the second :)

Stashbusters

 Sorry it got quiet around here.  I've been a little busy :) .


Courtesy of Sir Eats-A-Lot and the Princess of Wails.


They've been keeping my sleep deprived self on my toes lately.  Between the baby's growth spurt and the normal nearly 3 year old drama I haven't had as much time to be crafty. Baby bear is going to be 7 weeks old on Monday.  I can't believe how fast time is flying.

As for other news, in my efforts to be thrifty I have made a solemn vow not to go to Joann's or Michael's or Hobby Lobby or the crafty aisle at Walmart unless I am in dire need of a certain supply for a certain project.  It's ok, because I already have a ridiculous amount of crafting supplies in my stash.  Things that I just loved and HAD to have, things that I found a really great deal on and couldn't resist, leftovers from other projects... you get the picture.  So I am STASHBUSTING!  When I come across a project I would like to do, I must make every effort I can to use things I already have.  As Tim Gunn might say, "Make it work!"  I'll let you know when I've done a stashbusting project, and if your supply stash is just begging to get pulled out of the closet please join me!