


Quiet Books: Busy Bug Style
I started making quiet books about a year ago, as Christmas gifts for Natalie and my daycare girls.
I gleaned my ideas from all over the internet and stored them on my pinterest board. I searched for templates and just plain adorable pages that covered a variety of skills and came up with 8 pages that would make for a fun quiet book.

I attached them to a cover using grommets and binder rings so that I could easily add more pages and take out pages that had they had outgrown or grown tired of.
This year I've made a few more pages to add to their books and made a book for another one of my daycare girlies.
I'll go through the pages I made, list any templates I used, and share a few of my tips and tricks that came in handy when designing my books. I did not include any information on my book covers. A tutorial will be coming on that separately since I still need to make a cover for Sadie's pages. Quiet Book Cover Tutorial HERE.
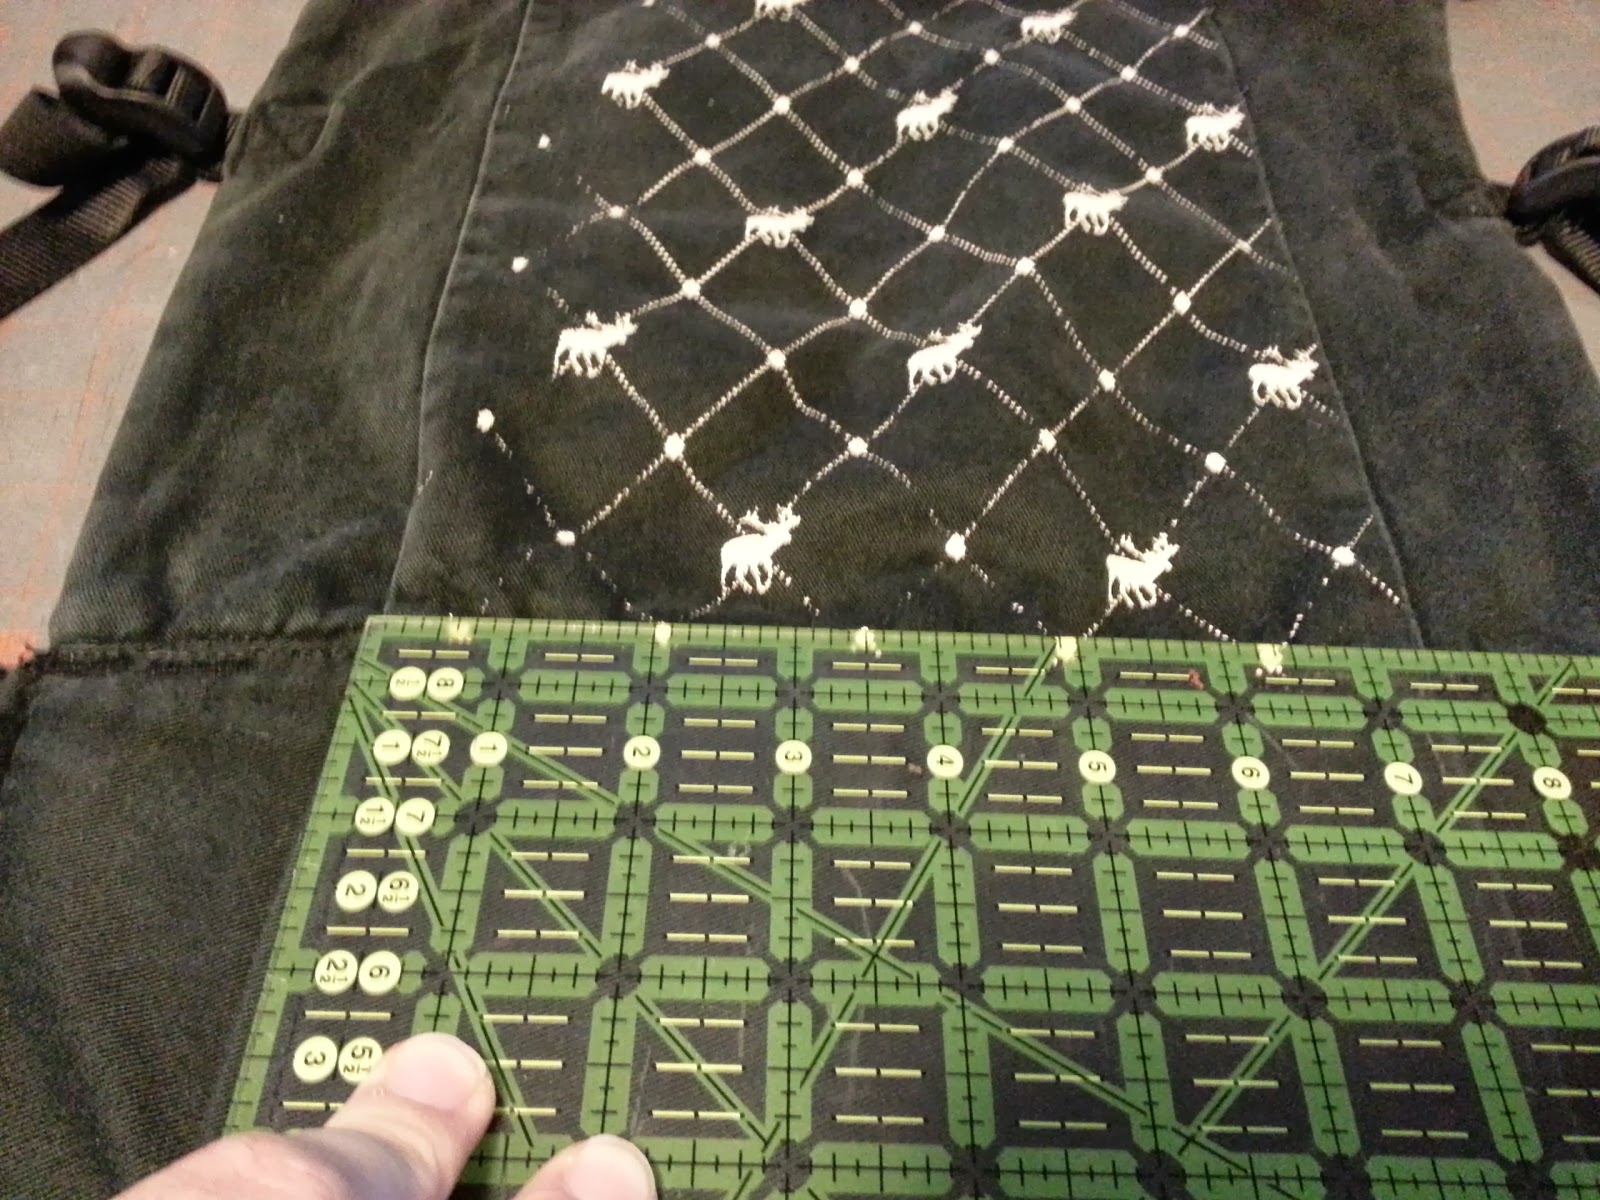
I relied heavily on my cricut when I was designing my pages. I used the Sure Cuts A Lot 2 program which allows me to cut the images I create in the program without relying on a variety of cartridges.
My pages are 10" x 12" finished, so I was able to design effectively on the area of a 12 x 12 cutting mat. It was very helpful to use the program because it was easy to make plans and make changes without committing or spending a ton of time hand drafting. It also made cutting the patterns a lot faster and more precise. It was easy to use the measurements to make PDF templates of the when they were perfected.

The first page has their names with snap on letters, and button up flowers in a vase. I was inspired by this page and this page. I found a nice chunky font and made sure that the names were no more than 9" or so wide and 4 inches tall. The flower is about 2" in circumference and I just added a buttonhole that fit the size of my buttons instead of cutting the hole in the center of the image. I hand drafted the vase, it is about 2" tall and 2" wide with a little shaping to make it vase like.


This is an example of how I was able to plan on the Sure Cuts A Lot program, you can see how the grids can help and how plans changed for how large the different names were depending on how many letters are in the name.
The second page is a dress up girl and closet to keep her clothes. I found the template for the girl and the clothes here. The closet is a 8"x 4" rectangle cut in half. I used regular felt for Natalie's page, and then stiff felt for the lastest page that I did. The stiff felt is definitely much better!


Page 3 is a washing machine and clothesline page with a color matching game included with the socks. Here is the template. I found the inspiration for this page here and here.


Page 4 is all about numbers 1-10. As a teacher, I taught Touch Math to my students and it really helps with addition and subtraction for young mathematicians. I added buttons to touch points to teach touch points and help the children match a quantity to the numeral. The numbers can be stored in the pocket and velcro sticks them on the page. Template here. To make the pocket, fold over the top edge of the fabric 1/4" and then fold it over again about 1/2" and sew to make a casing for the elastic. Sew the elastic into the casing and then get ready to place the pocket on the page. You will want to fold the edges under 1/4" on the other 3 sides and pin, adding a few pleats on the bottom of the pocket to accommodate the extra length. Finally, sew down all 3 sides.


The fifth page was inspired by an ice cream patterning activity that I found when making busy bags for my kids. I added the menu/counter pockets to store the pieces to the game. Here is a template for the shop portion of the page. I wrote out the signs using an ultra fine tip sharpie.


This page was inspired by a cupcake building busy bag game and I turned into a cupcake bakery page. The cupcake game can be found here. The pieces are stored in the pocket behind the oven. I was inspired by this oven, but thought the cupcake building was more fun than have premade cupcakes.


It didn't really make sense to make a template for this page since it is all rectangles that are too large to print on a letter size sheet of paper. Here are the basic dimensions for the oven. The black glitter felt is 8 3/4" wide x 9" tall and sewn on 3 sides, leaving the top open to be used as a pocket. The oven door started as 2 8 3/4" x 9" rectangles and a piece of vinyl (this vinyl was from a duvet cover bag) cut to the same size. I layered all 3 rectangles together and used a paper template cut to 6 1/2" wide x 6" tall to place the oven window and sewed around the edges of the paper template. I centered the template width wise, but placed it just 3/4" up from the bottom to leave room on the top to accommodate the handle. After I sewed around all 4 edges of the template I trimmed out the blue and white felt from the center and trimmed the excess vinyl from the outside edges of the window. Finally I sewed around the outer edges and added the velcro and the ribbon handle. The oven door opens and closes with velcro in the top corners.

The sixth page is a lacing page/tying page, but has been different for all the books I have done. Natalie has a basic, converse style shoe to lace and tie using some fun fabrics. I did a football cleat for another girl that is a Raven's fan. For my monster loving daycare girl, I made a fuzzy monster that has a vest to lace and tie. Sorry, no templates for the shoes or monster. I modified my shoe pattern from this one.


The latest page I did omits the lacing and just focuses on tying the bow for the ball gown. Template for the dress here.

The seventh page is a weaving task. I did a "weave the blanket" page for the first few books.

Then I saw this "weave a pie crust" page and had to do my own version! So cute and less intimidating for the kids than the weave a blanket page. Template for pie weaving page here.


Page 8 is a barn with farm animal finger puppets designed by Homemade by Jill. I modified it by making the door a zippered pocket to hold the farm animal puppets.

This year I have made a few new pages to add to Natalie's book and my monster lover's book. They are a whole year older and could use a few new challenges!
This page is inserted after page 4 as a follow up to numbers 1-10. The bead strings show place value for the tens and ones columns and numbers 11-20 snap on and off. They can also be stored in the pocket with numbers 1-10. Template here.


On the other side of that page is a clock face with movable hands and a zippered pocket with cards to show digital representations of the analog time shown on the clock. Template here with black number cards. Template here for colored number cards. There are grommets on the hands just like the grommets on the pages themselves so they move quite freely under the button.


Next comes a Marble Maze! I saw a few ideas out there, but the mazes were not very fun so I made up my own to keep up with my 4 year old daughter. The fact that the hubby played with it for a full 10 minutes figuring out all the different paths he could take to get to the end tells me I get a thumbs up : D Template here. Cut the fabric to 9" x 11.5" and fold the edges under 1/4" on all sides when sewing onto the page. Don't forget to put in the marble before you close the last side! Then embroider the maze on the fabric using embroidery floss. I couldn't seem to get the orange to pop on camera as it does in real life :(


On the back side of that is what may be my favorite page ever, a mailbox with ADORABLE letters and envelopes to send in the mail. I found the template here.

One of Natalie's favorite new games to play is tic tac toe, so I included a board and playing pieces stored in the pocket. Template here. The pocket is constructed in the same manner as the pocket on the numbers 1-10 page.


On the back side of that page is an I-SPY bag that snaps out for I-SPY fun. It is a rather noisy page for a quiet book, but is quite fun :) There are great tutorials for I-SPY bags all over blogland, here is one that I like.


I know these books are on the girly side....because all of the books I have made are for girls! I will be diving into some more boyish pages soon, I'm hoping to finish a quiet book for Nathan's 2nd birthday featuring trucks, tractors, trains, and other things that go.
I hope you enjoy my quiet book goodies and are inspired to make your own!