Wednesday, August 11, 2010

Green Ruffle Shirt

I did my first refashion for Bug's fall wardrobe, and I love how it turned out! I took ideas from Samster Mommy's Tuxedo Tank Refashion. I got my green thermal tee that I thrifted for $1.60 and a long sleeve shirt that will fit Bug in the fall.
Photobucket Photobucket

Cut apart the shirt at the side seams, neck seams, and sleeves.
Photobucket

Since there are existing hems and neckbands already on the shirt, I decided to use as much of those as I could.

Using the "pattern" shirt I marked where to cut the sleeves and cut them out (Don't forget seam allowance!) The sleeves ended up being a pretty close match to the pattern shirt, so I left them as is.
Photobucket

Now lay the pattern shirt on top of the front piece of the shirt. I lined up the middle of both shirts, and made sure that the FRONT necklines on both shirts were matching up. I marked the cutting lines for the shoulder and sleeves.
Photobucket
Photobucket

Fold the shirt in half and cut along the lines. I prefer to use a rotary cutter for most of my cutting, and a quilting ruler for straight cuts. Repeat with the back of the shirt.
Photobucket
Photobucket
Photobucket

Using the strips left over from trimming down the sides of the shirt, cut five 1" wide strips of fabric.
Photobucket
Photobucket

To ruffle them, set your tension to 0 and use a long stitch length. Sew down the length of the fabric without tacking down your stitches. Then by tugging on the bobbin thread you can gather the fabric into a ruffle.
Photobucket

Pin your ruffles to the shirt and when they look right sew them down. I had to trim my ruffles to get the v-shape. Don't forget to put your tension and stitch length back to normal :)
Photobucket
Photobucket

Stack the front and back of the shirt, right sides together, and sew up the seams by the neck.
Photobucket

Hello Beautiful!
Photobucket

Serge (or stitch with a zig zag or stretch stitch) down the side seams.
Photobucket

Lay out a sleeve on the shirt and pull inside of the hole. Make sure that right sides are together and the seam on the sleeve matches up to the side seam. Pin and serge (or stretch stitch or zig zag). Repeat with the other sleeve.
Photobucket
Photobucket

Admire your handiwork, my shirt is just about the same size as the pattern shirt. I think I want to leave the hem a little longer on mine.
Photobucket

Sigh and wish for a coverstitching machine, then hem the shirt. I like to use a twin needle in absence of a coverstitching machine. You could also just cut to length and leave the raw edge, it won't unravel.
Photobucket

Photobucket


Try on toddler in the dead of summer:) It should be perfect in a month or two!
Photobucket

Tuesday, August 10, 2010

One Bathroom Down!

So I finally finished the downstairs bathroom! What a project it has been, but I love to look at the new colors! While I desperately wish there was something crafty that could make the brassy gold shower look great, and that we had new flooring in the budget, it makes me happy to walk in the bathroom and see a bright new space!

I didn't take before pictures, but before it was a muted yellow with an awful wooden medicine cabinet above the sink and periwinkle plaid curtains (that we inherited from the sellers and I despised looking at).

So, the bathroom got a facelift. Paint, a new mirror, wall art, curtains, towels and rugs. We also ditched the toilet paper roll on the wall in favor of a tp stand.


Here are the eyesores that I could not fix, but I can live with now :)


There is actually a boarded up hole to the crawlspace under this rug, and the linoleum has seen better days.


The leaky, brassy shower. Every other fixture in the room is silver or brushed nickel, but they chose a gold, brassy shower...

The old ugly fan with the magnetic cap.

The only thing that keeps the bathroom warm in the winter. You should see the sinister heating element that glows bright orange!

I'm so relieved that it's finished (for now at least). Onwards and upwards! The upstairs bathroom is next!

Sunday, August 8, 2010

Productive

I feel incredibly productive today. Yesterday I finished painting that darn bathroom and we hung everything back up, just curtains and exchanging the too-small rugs and I will be ready to share pictures! I also painted the trim in the kitchen white. It was yellow, but some grumpy man in my house thought that since all the other trim in the house is white, the trim in the kitchen should be white too. As much as I hate to admit it, I think I like it better white. It looks very clean :)

The grumpy man I mentioned before was surprisingly productive today as well. He tried to save our kitchen door so that we could hang it back up. This door has been through it all. It is probably close to original to our house (built in 1890), so obviously had been painted on multiple occasions and was looking pretty sad. Thinking that we'd help it out, we decided it would look fabulous with some natural wood stain on it. Enter the saga of the kitchen door, if you make it to the end of it's sad little vignette, I applaud you!

We set to the task of stripping off all those many layers of paint, and were very unsuccessful, as the door has many grooves and little crevices. We scrubbed, scratched and sanded to no avail. In a last ditch effort to rid the door of paint, my brilliant husband decides to powerwash the door. He only succeeded in stripping away all of the soft wood, leaving little ridges all over the door and paint was STILL in the crevices. The door has sat in different areas of our house for over a year, looking very sad and neglected. We decided to restore the door to it's home after filling in most of the ridges caused by the powerwashing with wood filler and giving it a fresh coat of paint. Now that the door has returned, the garbage can is looking for a new home...

Friday, August 6, 2010

Gotta love Thrifting and Clearance shopping!

I love browsing thrift stores, there are always great deals to be had! Here is my score from a few hours and a few thrift shops!

I got 3 wool sweaters, 2 dress shirts, 2 t-shirs, and 2 pairs of pants, all for $30!!

Outlet shopping at Old Navy's Clearance section was also very fruitful, 3 cute t-shirts and a pair of khakis for under $10.

Most of this is going to get refashioned for Bug's fall/winter wardrobe, I'm so excited and can't wait to get started!!

Thursday, August 5, 2010

Busy Busy

I have been plugging away at my summer projects. I decided to start by painting the downstairs bathroom a nice roasted squash/pumpkin orange, which I have been doing for 5 days now during naptime and bedtime. After FOUR coats of paint on the walls and FIVE coats around the edges, I think I FINALLY have all the walls completely covered in orange. After this experience, I have decided that the next time I want to paint a finicky color I will get REAL primer and will NOT listen to the lady that says the primer stirred in the paint will do the same thing. *sigh* I still have to paint the ceiling and trim as well. I can't wait until the paint is all cured so that I can start hanging my new mirror and wall art :)

To take my mind off of the tedium of painting (and to avoid household chores) I decided to start working on Bug's fall/winter wardrobe. I have a ton of fun ideas, but it may take a while to get everything going. I started off with a cute little milkmaid skirt. She can wear it now, but in the fall I can see it being so adorable with some baby legs and a long sleeved top/jacket. I used this tutorial from crafterhours, and I am totally in love with this skirt!


I love how her hands were on her pockets in this one!

And a back view


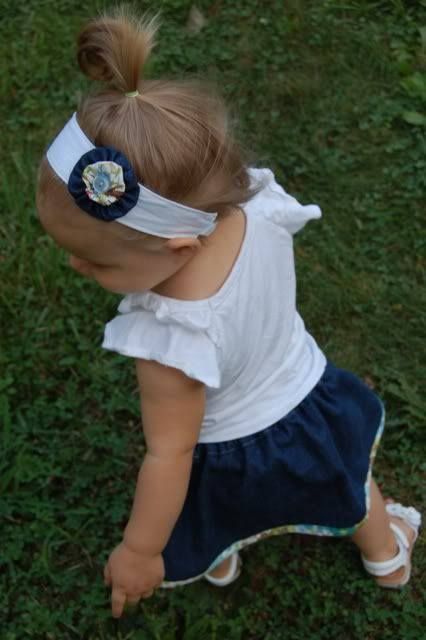
Here is what will become my first tutorial on my blog! A headband with interchangeable embellishments.


And what good is having a blog if you can't post pictures of your kid just because they looked too funny.


I think Diva Natalie was quite finished with her photoshoot so she gave me the stink eye!