Tuesday, April 24, 2012

Thrifty and Thriving #4

 My sister and I took the kids to the thrift store this weekend.  I love shopping thrift stores, but I think I might be giving up on Goodwill.  They've raised their prices so much that it is hardly worth it anymore.  I always seem to get some great finds at this thrift store, and I scored some great deals this time.

 A summer dress for Natalie (I don't even have to make any adjustments!) and a little romper for Nathan
 Tea kettle that matches the color of my kitchen cabinets perfectly, frame to contribute to my "wall of frames" collection, and two pyrex dishes.
This duvet cover has tons of yardage, blue dots on one side, green dots on the other.  Natalie has a;ready requested a new dress with the green fabric.

My finds totaled up to  $17.62.  I am pretty happy with myself.

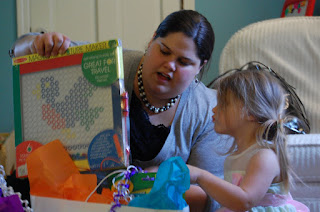
My sister found a caboodle basket for $0.66 (which she was wayyyy too excited about ;) and we were both intrigued by the pan we saw that was just like the one in the picture below.
We picked it up wondering what on earth it could be used for, and lucky us, it was printed right on the pan!  "Danish Ebelskiver Pan" or "Apple Pancake Ball Pan"  That was enough for us.  We hadn't eaten lunch yet, and apple pancake balls sounded like they would be yummy, ha ha.

She kept the pan with her, because apple pancake balls sounded like they would be easy to ruin, and I can ruin mac 'n cheese on a good day.   We're looking forward to trying it out one of these days.

Thursday, April 19, 2012

DIY Sticker Mat

What fun is it to have birthday stickers if you can only stick them once?  Bug needed a sticker worthy surface that would let her peel and restick her fun new stickers.

 So I peeked into my closet to do some stashbusting and found a cricut cutting mat that had served its purpose.  It was no longer sticky enough to work properly (which could be remedied with glue materials) and it had gunky corkboard chunks stuck to it (I tried but they are S-T-U-C-K stuck). It had seemed like a waste to throw it away, so I kept it, knowing a day like this would come.  I pulled out some scrapbook paper and had just enough spray adhesive left in the can to glue the scrapbook paper to the mat.
 Then I covered both sides in contact paper and smoothed out the bubbles.
Trim around the edges and voila! a sticker mat for hours of sticking and resticking pleasure.

It seriously took less than 10 minutes from the time that I peeked into my closet to done.  Can't ask for an easier early morning project. (Don't you just love the bedhead? :)

Wednesday, April 18, 2012

Happy Birthday Bug!


My girl turned 3 yesterday.  I can't believe how big she is and how much she has grown in the last year.  We didn't do a big birthday party this year. but we did have a special dinner with family.  She loves Peter Pan, so we did a pirate themed dinner.  We had fish sticks and walk the plank fries, mac n cheese, crocodile salad, and Natalie and I made these little pirate ships for hors d'oeurves.


We also made her birthday cake.  Funfetti sprinkles inside and out, Natalie had such a great time with the sprinkles and frosting.  She had a hard time stopping at 3 candles too.  She wanted to put on all 6 from the package.


My family came up and we opened presents and played together.


Then it was time for "happy birthday cake" and ice cream!  My Bug is the funniest kid.  After she blew out the candles, my sister told her to pull out a candle and lick the icing.  She gave her a funny look, but then went for it.

First she pulled out the candle.

Then she licked the icing!

I don't think I've stopped laughing over that one :)

Today was another day of birthday fun with Robert's family, we've got lots and lots of fun toys to play with and pretty dresses to try on.


Thursday, April 12, 2012

Cookie Concentration Case Tutorial


We love our cookie concentration game.  However, the gallon size ziploc and construction paper game mat weren't faring too well with all the use they were getting.  Our upgrade is quite fabulous in my humble opinion :)

Materials: Fabric- 2 cuts 11" x 21"
                            - 1 cut 32" x 1.5" or 32" bias tape
                            - 1 cut 11" x 2.5"
                  Vinyl - 1 cut 11" x 8.5"
                   Zipper - 11"
                  Velcro - 1.5" of both sides
                   Embroidery Floss

 Easy way to get vinyl and a zipper- upcycle it from a bedsheet package you have in your stash :)
 1- Take your 11" x 2.5" piece of fabric, fold it in half and sew.  Turn it inside out  (a loop turner makes this easy!) and press with the seam in the center.
 2- While the iron is hot- make your bias tape.  There is a great tutorial on making bias tape here.  Cut into two 11" pieces and two 5" pieces. (Mine is not cut on the bias, while true bias tape that is cut on the bias is better, sometimes it is easier to cut on the grain for some purposes.)  To iron, I folded the fabric in half and ironed it, unfolded it, folded the outside edges to the center crease, ironed them down, then folded the tape in half and ironed again.

 3- Start the game grid.  To make your sandwich, take your two cuts, lay the inner face up, the 11" tube in the center with the seam side down, and the outer face down.  Sew around 3 sides, leaving the bottom open.  Turn and topstitch around the 3 sides, iron again if needed.
 4- Mark out the 3 x 6 grid.  My lines are 3 1/4" apart.
5- Sew down the lines with the longest stitch on your machine. We'll embroider to define them later.
 6- Start on the case!  Sandwich the vinyl face up, grid face up, zipper face down.  Sew a seam down the sandwich.
 7- Cover the seam with bias tape, pin, and sew.
 8-  Roll up the grid and pin.
 9- Fold up the vinyl to the other zipper half, pin and sew.
 10- Cover with bias tape, pin and sew.
 11- Open up the zipper, and turn right side out.
 12- Flatten out the pouch, fold and pin bias tape to the edge, and sew.
 13- Attach bias tape on the other side and you have a case :)
 14- On the tube, fold over the edge two times and pin.
 15- Pin and sew sticky side of velcro to the top over the center seam.  Pin the soft side of velcro to the base of the tube on the opposite side.
 16- Time to embroider the grid! I used a whipped running stitch with embroidery floss over top of the machine stitched lines.

 In short, run the needle through the top of the stitch, pull through, and lather, rinse, repeat.


And TA DA! You're ready to play cookie concentration in style!

 Houndstooth. Grey. Yellow. YES PLEASE!! (I'm keeping this one for me and Bug.)


 P.S.  I think the grid could be equally cute (and less time intensive) using ric rac or other types of embellishment, I just didn't have any on hand in my stash.  If you do want to use another embellishment like ric rac, I would sew it on the grid before making the sandwich for the top, then sew the sandwich as directed to conceal any raw edges.


Tuesday, April 10, 2012

Easter Sunday

 Easter just isn't Easter without some new duds and a basket full of grass just waiting to be filled with colorful hard-boiled eggs.
  The duds are infinitely more adorable when you make them yourself.


 And you have the cutest children in the world to wear them.

 Nathan with my mom
 Nathan with my sister
 A bona fide picture of me and my girl!
 Natalie and Daddy hunting for eggs